
There will be LOTS of challenges, tutorials and other fun things going on tomorrow, April 17, through Monday, April 21. You'll want to watch the 3SB blog daily and check out the DT member's blogs as well (see the schedule below)...
We'll be posting all of the challenges, as well as some tips/tutorials on the message boards in one spot so that you can keep up with everything.
There will be several prizes up for grabs including two April kits, several gift cards and multiple prize packs!!
So today it's my turn to share a tutorial, tip or trick. So I thought it would be fun to type up a tutorial of how to make these:
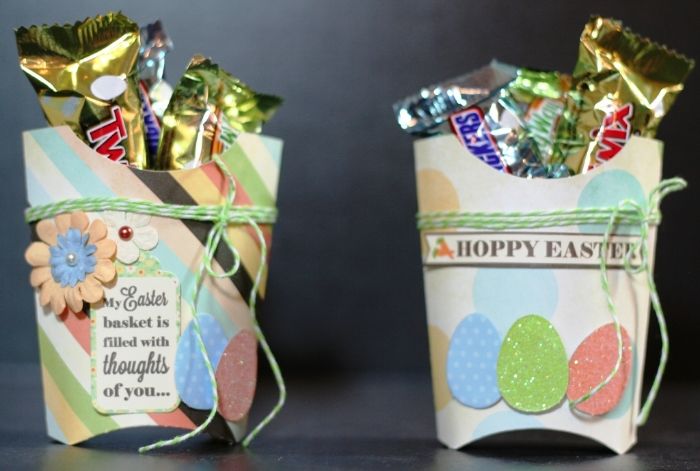
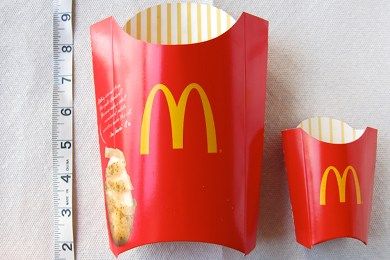
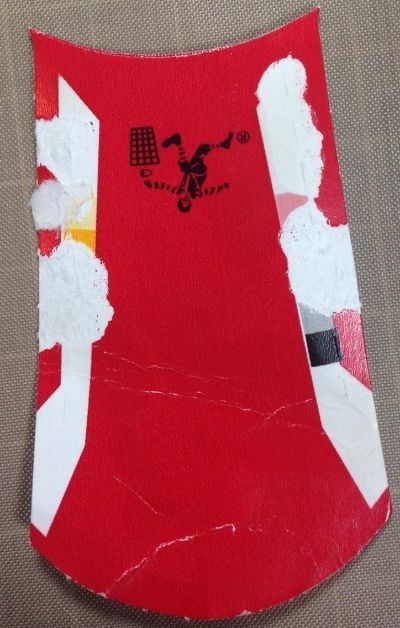
I was inspired to make these when I was at my sister's house and her kid's had a Happy Meal from McDonalds. They had the cutest mini fry container I'd ever seen! I took one home with me and decided they'd make a cute treat box for my friend for Easter. Here is the new mini fry box. They used to just be made from paper. See how much smaller it is than the regular fry box?
Step 1 is to go and buy yourself a Happy Meal or you might even be able to ask for a mini fry box if you order a value meal...not sure.
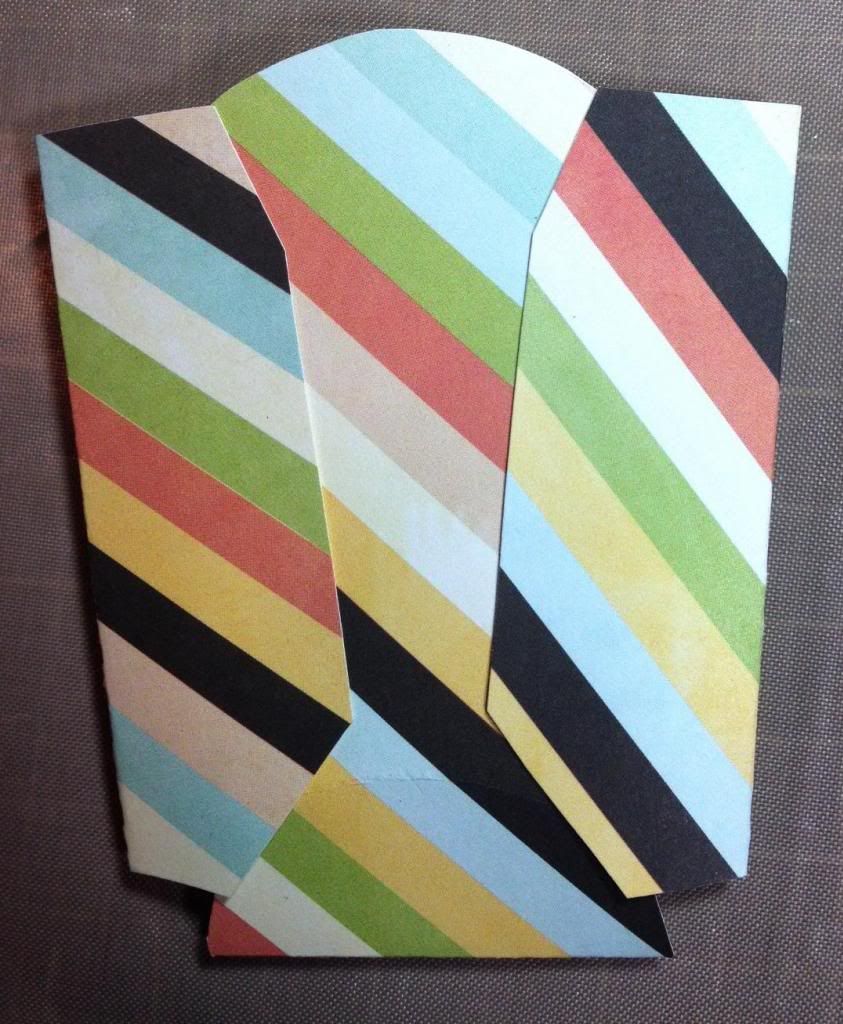
Now, with this adorable mini fry box in my mind I dug through my 3SB stash and found these cute Fancy Pants papers from the August 2013 Trio kit. To start, you're going to carefully undo the seams of the fry boy
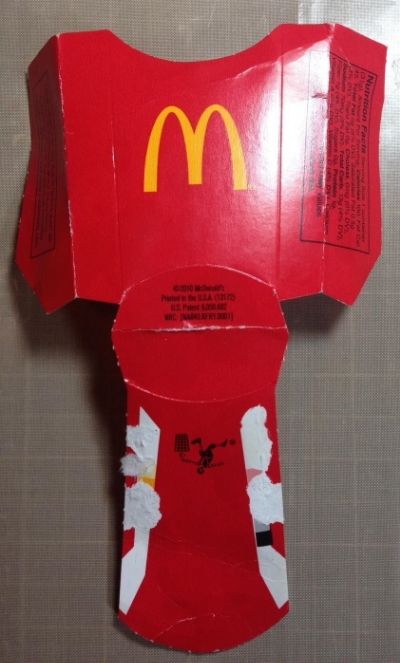
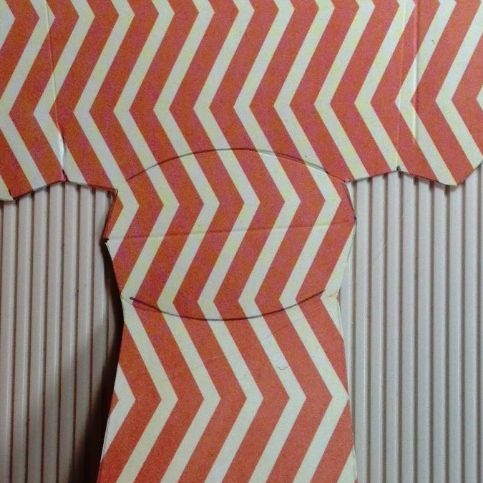
Now flatten it out, trace it on the back side of your paper and cut it out.
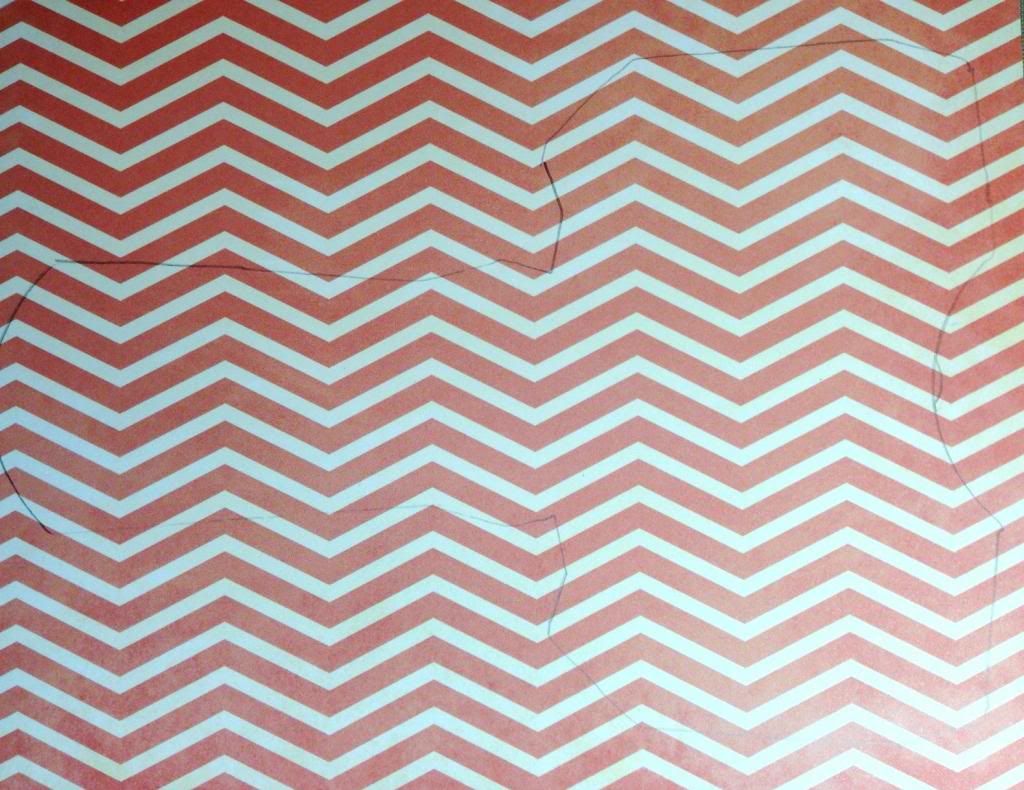
Now you'll need to score where the original fry box is scored so it folds up easily. I used my Martha Stewart Score Board. I made a little mark with my pencil using the original fry box so I knew where the line went and then lined it up on a straight line, and scored it. You'll have two long lines and the center line on the rounded bottom part.

Now to score the rounded part of the bottom. First you need to cut the little tab part of the fry box off, following the curve as much as you can.
Next, I took my bone folder and gently went over the traced line for the circle. I only did this for the bottom circle. If you don't have a Score Board, you could do that for all the lines with a ruler to be your straight line or you could use a scoring blade on your trimmer if it has one.
And here's what the bottom looks like once it's all put together. See how the fold in the center is the same as the original fry box?
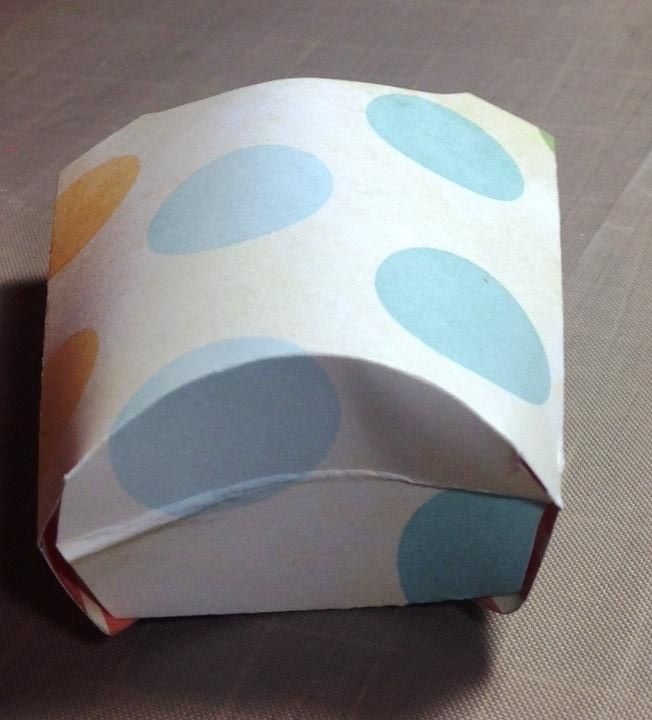
Once it's scored you will gently fold on the lines. Then put adhesive in the same places you took the mini fry box apart to glue your container together.
Here's my first one. Once I had it popped up, I kind of held up my embellishments to see how I wanted to arrange them and glued them on. Then I learned from this one and realized I could fold it flat like the original fry box.
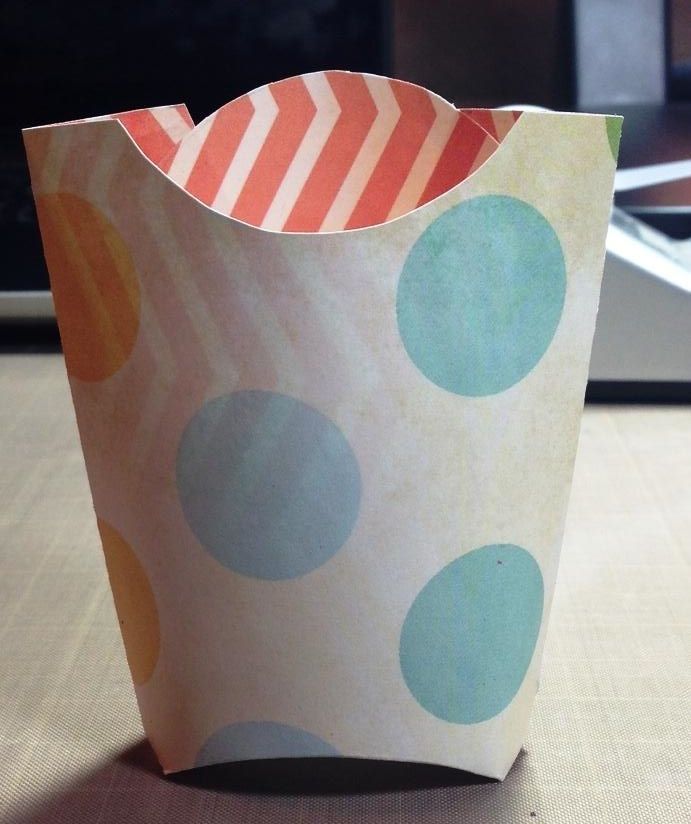
My second one I glued it down and then flattened just like the original does. That way I could pop it up and see whether it looked straight or not. I added the twine after it was all glued together.
Here's my 2nd one. See how it folds flat even after it's glued? I took this photo to show you what it looks like from the back once it's glued down.
Now you'll want to decorate it while it's flat. Just a warning..it does look different once it's put together so before securing something too well, you might want to see what it looks like once it's glued.
Then I added a little bit of Easter grass and filled it up with candy. I think this would be fun for any theme too. I thought it would be cute filled with jelly beans, m&m's or smaller candies if you put them in a cellophane bag and tie it with ribbon or twine. I think a regular fry box would be cute too if you want a bigger size. I hope you feel inspired in some way by this and if you have the time to create one I'd love to see it! Enjoy!!


No comments:
Post a Comment